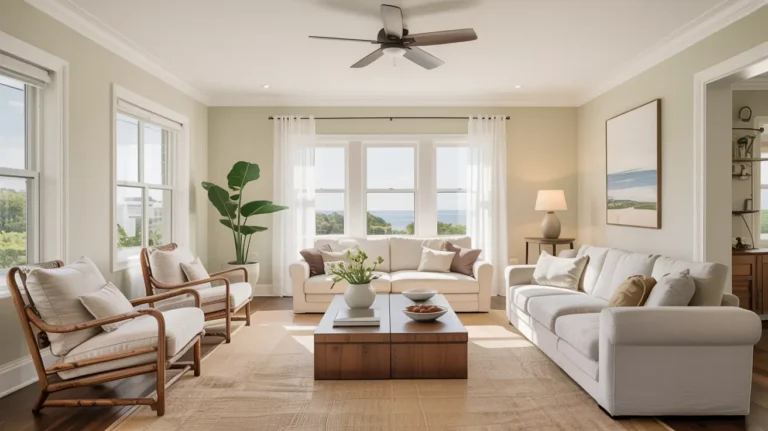
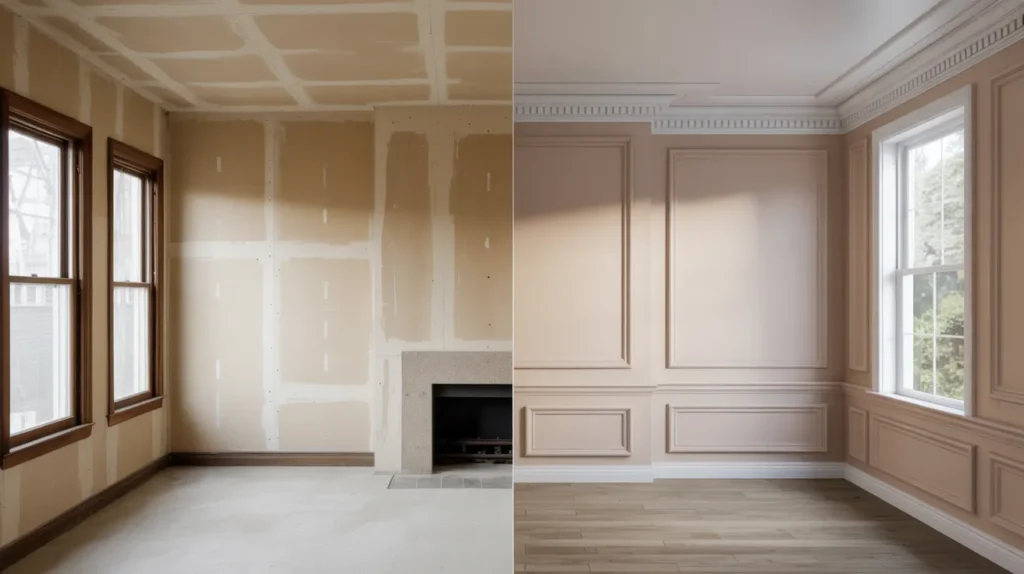
What architectural details really mean in a home
How to Add Architectural Details to Home Interiors ? these are the finishing touches that make a room feel built, not just decorated. Think trim, wall panels, ceiling features, arches, and built-ins. Decor sits on top of a room. Architectural detail becomes part of it.
Start by spotting what your room is missing
Some rooms feel flat because the walls look empty. Others feel unfinished because trim looks thin. A few rooms feel busy because too many styles fight each other. Start with one clear problem. Then pick one strong upgrade that fixes it.
Here are the most common pain points people feel:
- The room looks builder-grade.
- The walls feel blank and tall.
- The ceiling feels low and plain.
- Doors and windows look weak.
- The space lacks a focal point.
Match the detail to the size of the room
Scale matters more than the detail itself. Tall ceilings can handle taller baseboards and deeper crown molding. Low ceilings do better with slimmer profiles. Small rooms need restraint. One feature wall often beats four busy walls.
A quick rule helps. If you notice the trim before the room, it may be too heavy. If you never notice it at all, it may be too thin.
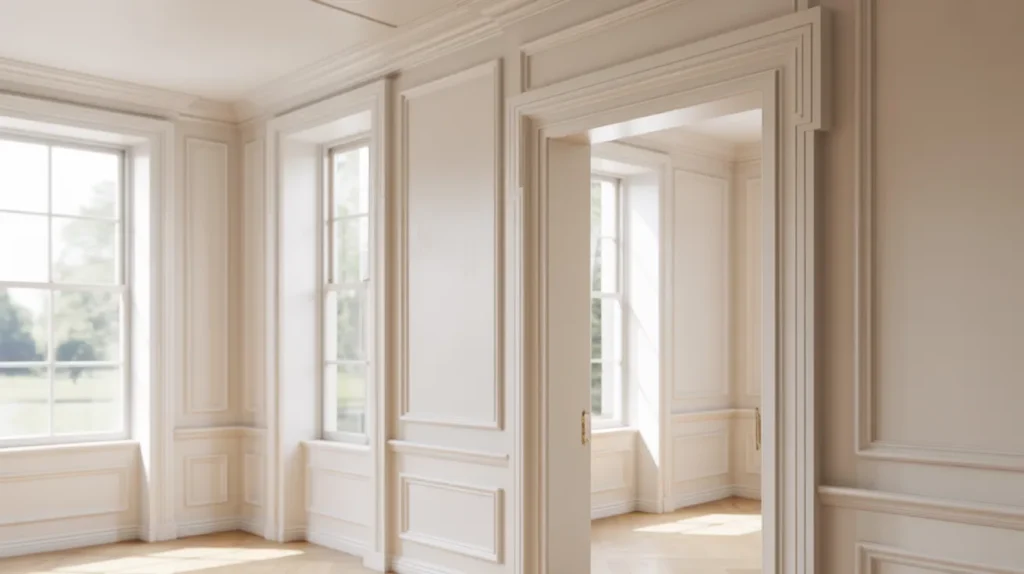
Start with trim upgrades that change everything fast
Trim is the easiest place to get a finished look. It frames your room like a picture frame. It also hides gaps that make walls feel rough.
Upgrade baseboards first
Thicker baseboards add weight to a room. They make walls feel grounded. If your baseboards look tiny, the room can feel cheap. Choose a simple profile if your home is modern. Pick a more detailed profile if your home is traditional.
Add or upgrade door and window casing
Door casing and window casing create instant structure. Many homes have thin, plain trim that disappears. Wider casing makes openings look intentional. It also pulls the room together when you repeat it throughout the home.
Use clean caulk lines and sharp corners
Trim looks expensive when the lines look crisp. Gaps and messy seams ruin the effect. Fill nail holes with wood filler. Sand lightly. Caulk small gaps. Paint after prep, not before.
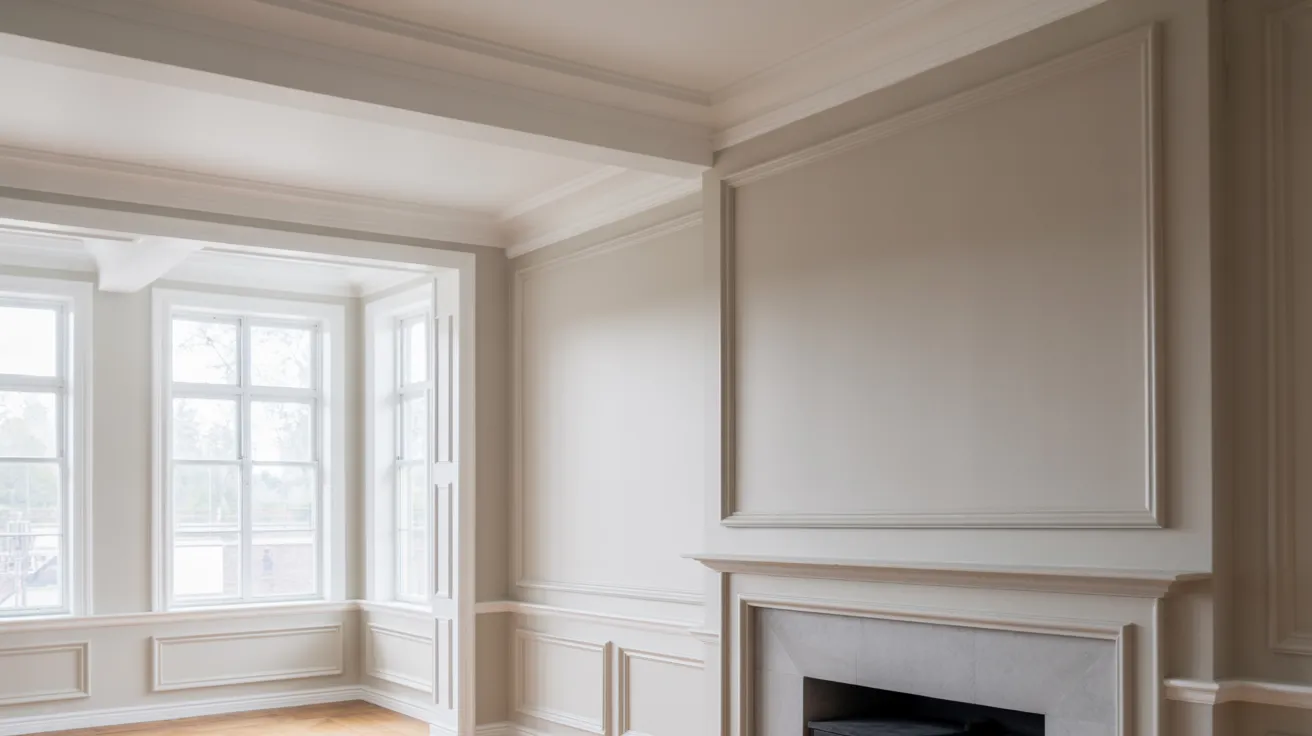
Add wall architecture without tearing out drywall
Walls offer the biggest visual payoff. They also give you space for style. Choose one wall detail that fits your home and budget.
Try wainscoting for depth and balance
Wainscoting breaks up tall walls. It adds shadow and rhythm. It works well in dining rooms, hallways, and bedrooms. Keep the height in proportion to your ceiling. Short walls often look best with lower panels. Taller ceilings can handle taller panels.
Use board and batten for a clean modern look
Board and batten gives you vertical lines and structure. It looks great in entryways and stair walls. It also works behind a bed as a feature. Keep spacing consistent. Use a level. Small errors show fast on long runs.
Create picture frame molding for a classic style
Picture frame molding adds a custom feel with simple rectangles. Paint it the same color as the wall for a soft look. Use a contrasting color for drama. This style works well in living rooms and formal spaces.
Add beadboard for texture in casual spaces
Beadboard brings charm and texture. It suits mudrooms, powder rooms, and cottage-style homes. It also looks great on ceilings in small rooms. Keep it simple so the texture does not take over.
Make the ceiling feel designed, not ignored
Many people skip ceilings. That is why ceiling details feel so premium. Even one small ceiling upgrade can change the room’s mood.
Crown molding can lift the whole room
Crown molding draws the eye upward. It softens the harsh wall-to-ceiling line. Choose a profile that fits your ceiling height. Go slimmer for lower ceilings. Go deeper for taller rooms.
Add a ceiling medallion for instant character
A ceiling medallion works best around a chandelier or pendant. It adds a focal point overhead. It also helps the light fixture feel anchored. Pick a size that matches the fixture scale.
Consider beams for warmth and structure
Beams add a strong architectural vibe. Real beams cost more. Faux box beams can still look great. Keep spacing even. Match the beam thickness to the room size. A tiny room can feel heavy with thick beams.
Coffered ceilings look amazing, but they are advanced
Coffered ceilings add depth and grid structure. They take planning and careful cuts. Many homeowners hire a finish carpenter for this. If you want a similar look on a budget, try shallow beam grids with simple trim.
Improve openings and transitions for a custom feel
Doorways and transitions shape how a home flows. When they look plain, rooms can feel disconnected. When they look finished, the whole house feels more upscale.
Add a cased opening between rooms
A cased opening frames a doorway without a door. It works well between a kitchen and dining area. It also suits open-plan homes. Use casing that matches other trim so it feels consistent.
Try an arched doorway for soft character
Arches feel timeless when done right. They fit Spanish, Mediterranean, and classic styles well. They can also work in modern homes if the details stay simple. Keep the curve clean and symmetrical. If the arch looks uneven, it looks cheap.
Use thicker trim builds for statement doorways
You can build up trim with layered pieces. It creates a deeper shadow line. This trick works well at the entry or a main hallway. It adds character without moving walls.
Built-ins give the strongest architectural result
Built-ins look like they were always there. They also add storage and function. A good built-in becomes a room’s focal point.
Built-in bookcases add structure and storage
Bookcases around a TV or fireplace can look custom. Keep the design simple. Match the trim to the rest of the home. Use consistent shelf spacing. Add cabinet bases for a grounded look.
Banquette seating creates a designed dining nook
A banquette can turn an awkward corner into a feature. It also adds hidden storage. Use durable fabric. Add good lighting above. Keep the back height comfortable for sitting.
Wall niches add depth without heavy decor
A recessed niche adds built-in character. It works well in bathrooms and hallways. Keep the niche shape simple. Add a small light if you want drama.
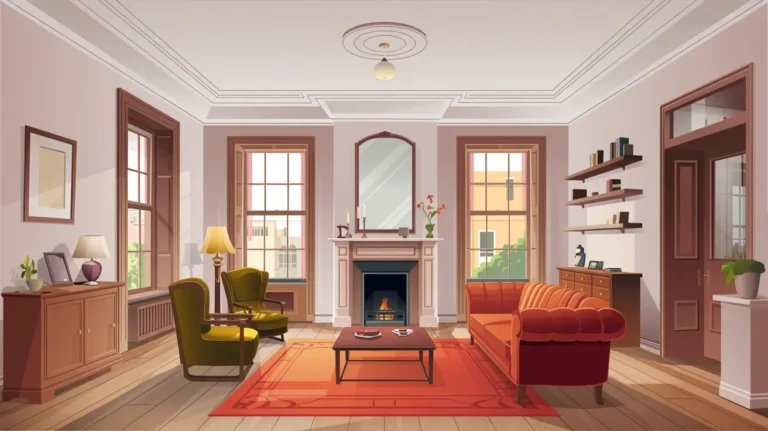
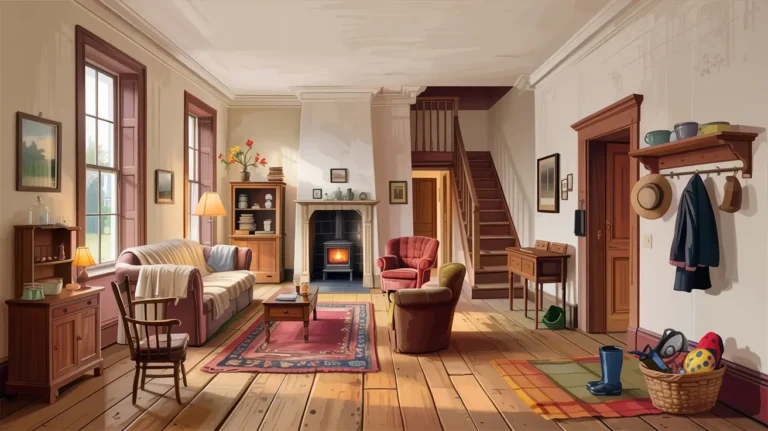
Upgrade the fireplace surround and mantel
A fireplace surround creates instant architecture. A mantel adds a strong horizontal line. Keep the proportions balanced. Oversized mantels can overwhelm a small room. Tiny mantels can look like an afterthought.
Pick the right materials so the detail lasts
Material choice affects durability, cost and finish.
Wood trim
Wood feels solid and holds crisp edges. It costs more than MDF in many cases. It can also expand and shrink with humidity. Paint-grade wood works well for most rooms.
MDF
MDF is smooth and budget-friendly. It paints well. Avoid it in wet areas unless you seal it carefully. Bathrooms and laundry rooms need extra care.
Polyurethane molding
This material resists moisture better than MDF. It can work well in bathrooms. It also comes in many profiles. Check the finish quality before you buy.
Paint choices that make details look expensive
Paint can either highlight detail or flatten it. The finish matters as much as the color.
Walls often look best in eggshell or satin. Trim often looks best in semi-gloss. That slight shine makes trim look clean. It also helps with wiping and wear. If you want a bold look, paint walls and trim the same color. Then use different finishes for contrast.
DIY vs pro: know when to hire help
Some projects are friendly for weekends. Others punish small mistakes.
DIY-friendly options include baseboards, chair rail, simple panel molding, and board and batten. These still need accurate measuring. They also need patience.
Call a pro for complex ceilings, large built-ins, major arches, and anything structural. A finish carpenter can also help match profiles to your home’s style.
A quick table to choose the right upgrade
| Detail | Best for | Skill level | Budget feel |
| Baseboards + casing | Whole-home upgrade | Medium | Medium |
| Wainscoting | Dining, hallways | Medium | Medium |
| Board and batten | Bedrooms, entry | Medium | Low to medium |
| Crown molding | Living, dining | Medium | Medium |
| Ceiling beams | Living rooms | Medium to high | Medium to high |
| Built-in bookcases | Living rooms | High | High |
| Fireplace surround | Main focal wall | Medium to high | Medium to high |
Problems people run into and real fixes
Problem: It looks fake or cheap
This usually comes from weak finishing. Sand seams. Fill holes. Caulk gaps. Paint with steady strokes. Clean lines matter more than fancy profiles.
Problem: The spacing looks off
In paneling, spacing errors stand out fast. Mark your layout first. Use a level and measuring tape. Dry fit pieces before installing. Step back and check symmetry.
Problem: The room feels smaller now
Heavy details can crowd small spaces. Use slimmer profiles. Limit detail to one feature wall. Match trim and wall colors for a calmer look.
Problem: It doesn’t match the rest of the house
Mismatch happens when you mix styles. Keep trim profiles consistent. Repeat the same casing through connected rooms. Save bold details for one zone if your home is simple.
Room-by-room ideas that work in real homes
Entryway
Add thicker baseboards and clean casing. Consider one board and batten wall. Keep it durable and easy to clean.
Living room
Start with crown molding if the ceiling can handle it. Add built-ins if storage feels lacking. A fireplace surround makes a strong focal point.
Dining room
Wainscoting adds instant structure. A chair rail can also work if you keep it simple. Good lighting finishes the look.
Bedroom
A panel molding feature wall behind the bed looks custom. Keep it calm with one color. Add matching trim touches for balance.
Kitchen
A banquette can solve seating and storage. Consider simple trim builds around windows. Keep materials durable near heat and moisture.
Bathroom
Use moisture-friendly materials. Polyurethane molding can help. Keep details simple and sealed well.
A simple order that keeps the project clean
Start with the biggest lines first. Then finish the edges last.
- Choose one room problem to fix.
- Pick one main architectural detail.
- Plan the layout on paper.
- Install carefully and keep lines straight.
- Fill, sand, caulk, then paint.
- Repeat one trim profile across connected spaces.
Final thought: one strong detail beats five random ones
A home looks high-end when choices feel intentional. Pick one signature move per room. Repeat it cleanly. Keep proportions right. Finish like you care. That is where the custom feel comes from.